Showing posts with label sewing. Show all posts

Sunday, June 5, 2011

Owls


A few weeks ago I was asked to do a comission project: a mobile for a nursery. A friend of a friend wanted one and... long story short now I'm making her one. I'd never made any owls before, only birds from the Spool pattern. But I found some super cute illustrations of owls for inspiration and made my own pattern and came up with this! Here is my test bird and I think she turned out so cute.


I just did an outline of the body with an elliptical shape on the bottom so it can sit. The wings are quilted and then hot glued onto the body, as are the felt eyes and beak. It's a great way to mix and match fabrics.


The mobile is for a boy and I was sent fabrics they had picked out. Just a word of advice, if you ever do a comission piece, always have the person pick out their fabric. There is no chance you will ever agree on colors, patterns, anything. Trust me.


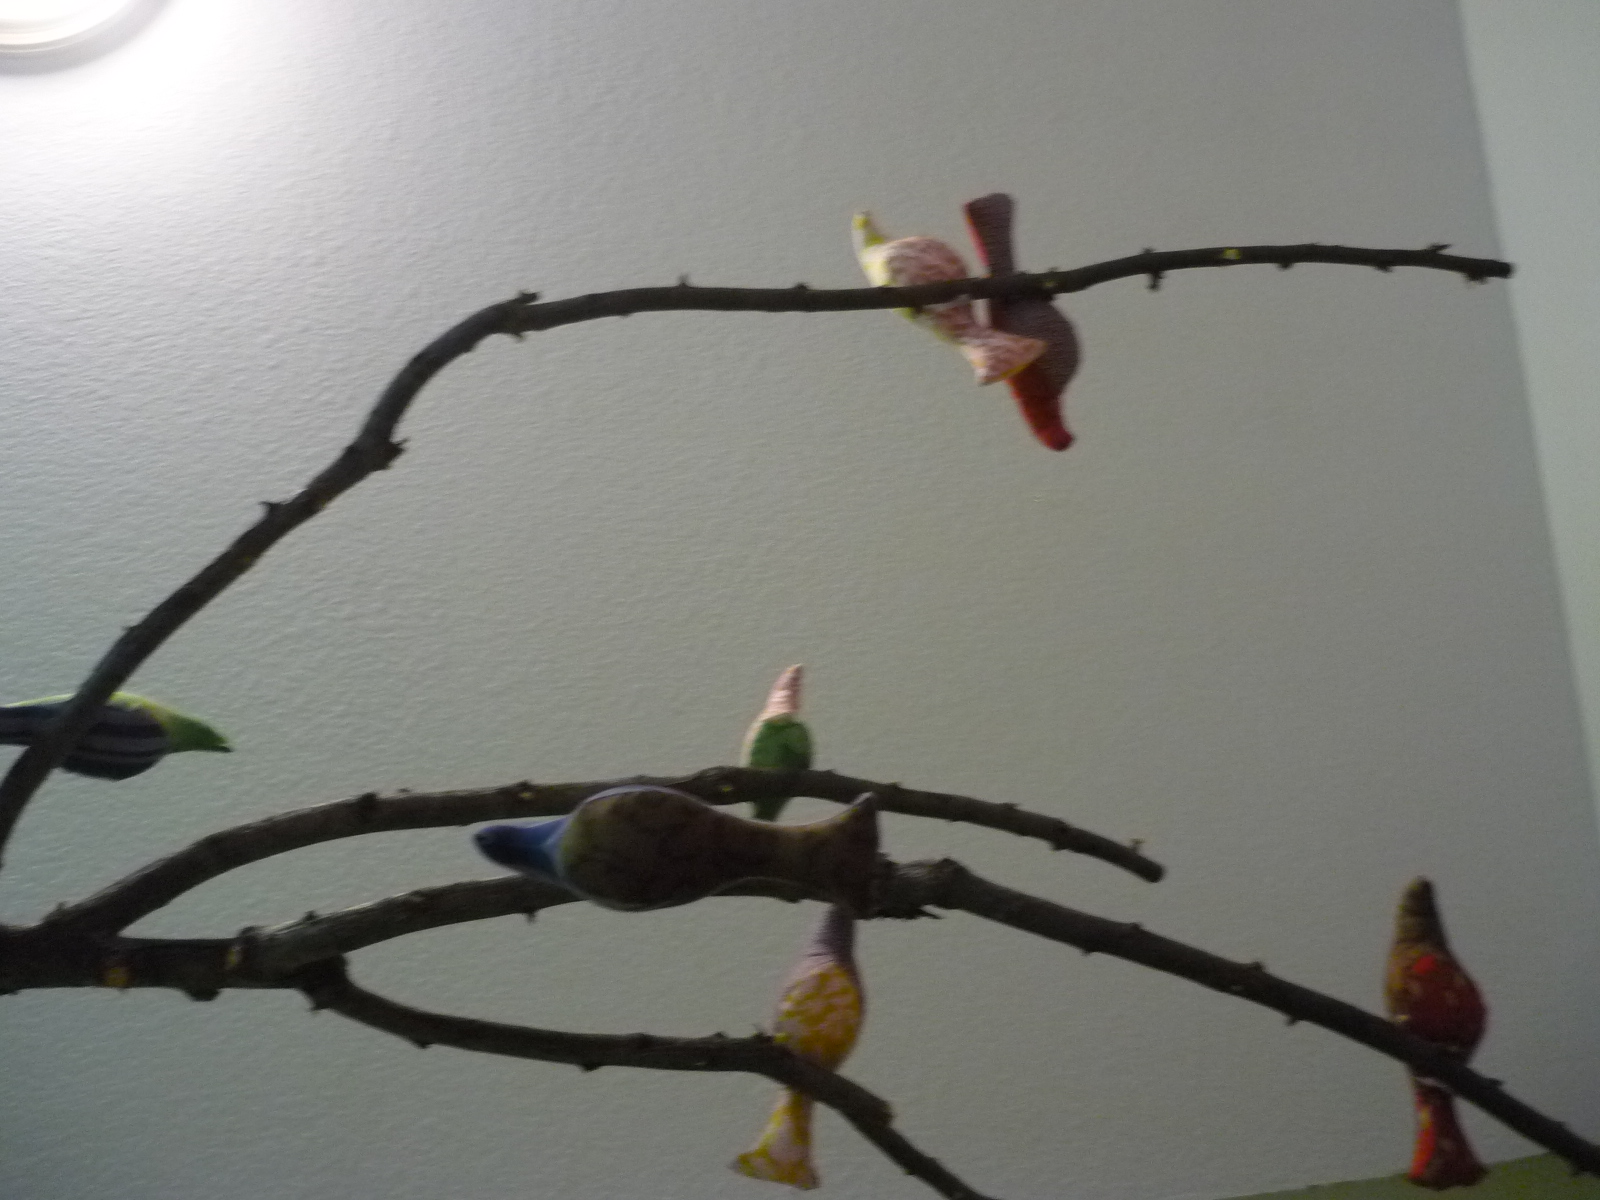
I had never balanced sticks in a tier pattern before. That was an interesting learning curve. I finally realized that each stick needed a tripod of fishing line to balance, at least the way I did it.


I made 3 extra owls for a diaper cake they wanted to decorate. And then a flat version for a bib decoration.


I really am satisfied with how they came out.


Now I know what you're thinking... You should sell these! Sorry, I've had enough owl sewing to last at least a year. But let me encourage you to make your own stuffed creatures--it's really a lot easier than it looks!

Monday, April 4, 2011

Sewing with Handwoven Fabric

Here are a few highlights of my process. The main problems with handwoven fabric come from its loose and unstable state compared to store-bought fabric. First of all, the edges ravel almost immediately after cutting and so they must be secured as soon as possible. I have used a serger before on handwoven, but those were all rather straight edges. I cut out a test piece, one part of the sleeve, and serged it. As you can see in the photo above, compared to the pattern, it has been skewed out of shape by the serging. I was actually able to stretch it back into the right size and use it, but it was a good indicator that serging was out for this project.


I would highly recommend using as large of a table for cutting as possible. I used to just lay fabric out on the floor to cut, but that is a huge pain--mostly for your back!


I ended up doing two things to stabilize and secure the edges. After cutting out all of the pieces, I fused very thin interfacing strips along every cut edge. This worked wonderfully to prevent the fabric from becoming pulled out of shape, and it kept the fraying to a minimum while I was working with it.


Here you can see how different the fabric looks after pressing, compared to unpressed. It was extremely shiny after pressing. Because of that, I did as little pressing of the finished garment that I could.


The other finishing technique I used was to cover all the raw edges inside with bias tape. This makes the inside look very clean and neat, and it prevents any sort of fraying. The only drawback is that the already somewhat bulky seams are now bulkier. Surprisingly, it's not visibly noticeable, only when you're wearing it do you notice.


My other tip for the day is: follow directions and stay-stitch the neckline! I don't know about you, but I always skipped stay-stitching. It seems like such a worthless step if you're going to sew it anyway, right? Well, remember my stretched out/wonky neckline on the brown version of this? I did not change the pattern at all, I just stay-stiched it and my neckline came out perfect. Live and learn!


Do you have a sewing tip that's either a short cut or something you've learned cannot be skipped? Share it with us!

Sunday, March 20, 2011

Inheritance Dress


It's finished and my entry form is submitted! Whew!


I'll post details about making it soon. Below is my artist's statement.


I feel the need to make clothing that tells a story. When I wear a garment, I imagine places I could travel to and adventures I could have in it. In my Inheritance dress, I can picture myself climbing ancient trees somewhere in Europe, maybe I’m sailing the Mediterranean… Although I might imagine incredible adventures about this garment, I will still wear it in my normal, everyday life. Clothing that is made to wear in everyday life, yet has a unique and extraordinary quality is what excites me. I could make an evening gown, but I couldn’t wear it whenever I felt like taking a walk down the street. I find myself embracing Anita Mayer’s idea of wearing something magical and unique every day.

There is something magical about the word inheritance. It conjures up thoughts of finding a hidden treasure; like a gift of something ancient. At first glance the fabric seems plain, but it has a surprising subtlety of iridescence that gives rich depth to the cloth. Like it could have been from a royal robe unearthed after centuries. For me this ancient gift takes the form of a new life through faith in Jesus Christ. I have recently been studying with my church Paul’s letter to the Colossians and this passage had an impression on me: “Therefore, as God’s chosen people, holy and beloved, clothe yourselves with compassion, kindness, humility, gentleness and patience.” Being so immersed in making clothing, I am always intrigued by the role of clothing in the Bible. During our discussion, we talked about the ancient custom of putting on a new garment when receiving an inheritance. Believers in Christ have been made God’s children and thus receive His inheritance, so we put on the new clothing of serving Him with joy. When I wear this garment, I want to be encouraged to show compassion and kindness, no matter what adventures life brings. I want to be reminded of the hidden beauty of God’s kingdom and my identity in Him. That is the real story being told every day.


Thursday, March 3, 2011

Pattern making


I'm trying pattern making again. Of course I'm self-taught so it's all a guessing game and past results have not been pretty. Ah, the challenge! This time is different because I'm using a shirt/tunic that I own to "rub" the pattern from.


I absolutely love this tunic. It goes with everything. It can be dressed up or down. And best of all, I can nurse the baby in it because of those handy buttons in front. I can't remember if I've ranted on here before about how my wardrobe pre-baby was all pull over dresses and, well, that just doesn't work when you're nursing. So this was a great find last summer and I want to duplicate it with my handwoven fabric.


Making this pattern has been very time consuming. In the picture above you can see the three different versions of the front bodice, from left to right, 1) traced from the flat garment, 2) traced on the dressform, 3) combined the two and retraced on the dressform. I was checking and rechecking the measurements--"measure twice, cut once" turned into measure 50 times, cut once.


Here is a "mock-up" that I made to check my pattern fit from fabric I had laying around. It came out surprisingly well with one major problem. As you can see in the above picture, the neckline is completely stretched out and wonky. And the button placket is not centered at all! Sometimes I will make the buttons off center on purpose.... this was not on purpose.


The best thing about this pattern is that it isn't precisely fitted. The back has a tie that cinches and makes the front tight. That made getting the fit right a lot easier.
I still haven't gotten the neckline quite right. I'm wondering if it was the bias tape stretching it and because I didn't stay-stitch it like you're supposed to. Any thoughts on getting necklines to behave?
Stay tuned for the handwoven version of this... it's in progress!


Friday, February 25, 2011

Cloth


I wish you could reach through your computer screen and feel my cloth. It is by far my favorite thing I've woven just because of the sumptuous texture. It drapes beautifully and feels like a textured silk. All 3 1/2 yards of it!

Washing it was different than I usually treat handwoven items. I have sewed with machine made tencel fabric before and so I knew that if you let it drip dry it feels like cardboard. But if you put it in the dryer--voila!--it turns into the loveliest softness.


I tried to capture the iridescence in this picture. I can tell the fabric is a little warp-faced (meaning more of the warp is showing than the weft) since the brown is definitely in the "background" and the blue is dominant. I still would have liked a darker coffee brown better, but it's too late to fix that so... stop thinking about it, right?
Now, on to the sewing!

Monday, June 28, 2010

skirts

This is the first skirt I ever made. It is an airline blanket that I took with me to the Cornerstone Music Festival, back in the summer of 2001. It was extremely hot and, out of desperation and a newfound hatred of shorts, I sewed this skirt with a sewing kit someone from the next campsite had. It is probably still my favorite skirt even though it looks pretty junky. It's certainly gotten enough wear these past nine years! (wow, I'm old.)

If the airline blanket skirt is my favorite, my brown circle skirt is definitely second favorite. I found this vintage brown linen at a garage sale about four years ago and made my first circle skirt. As you can see, the hemline is very uneven, in fact it's not really a line at all! I did not really know what I was doing and so the sides are shorter than the front and back. But, if you know me, you know that doesn't bother me one bit. I think this is the main reason I've stuck with sewing for so long. When most people would get frustrated and rip something out, I would just say, "eh, it looks fine" and wear it. I have definitely come a long way though...


Here's a close-up of the tie and button to keep the opening closed. (notice the sloppy stitching)


And here is my next attempt at a circle skirt, which as you can see has an even hemline--hooray! I think this one is only two years old. But it doesn't get worn as often because everything goes with brown, and not everything goes with this blue.
So, the point of this post is two-fold:
1) Don't let yourself get overly frustrated if you're learning to sew. If you are, do one of two things, either stop sewing and come back to the project some other day (I do this a lot!) or just say to yourself, "no one else will notice this mistake, so I'm not going to care." and just leave it. (I know I'm making some of you cringe.)
2)I absolutely love and adore circle skirts because they are extremely easy to make and they're very full without having gathers. So I thought I would post a simple tutorial here sometime before the end of summer. Believe me, if you make a circle skirt, you'll fall in love too!

Do you have a favorite skirt? What style is it? What makes you love it?

Monday, June 21, 2010

wrap skirt


A friend and I went in together and bought Heather Ross's Weekend Sewing. This skirt is from the book and is actually on the front cover. I really like how it came out, and it's perfect for summer.


Unfortunately, I have to say that the pattern's instructions are not written correctly. The directions call for 6 panels of the skirt for the medium size--well, that does not fit around my waist, much less overlap itself. Of course I just got some more material and cut out 2 more panels. I also had to lengthen the waistband/tie. But I can see a beginning sewer having a real issue with this. I'm sure Heather Ross knows what she's doing. It seems like a lot of patterns get written wrong in the editing process of a book or magazine--how frustrating!
Have any of you run into this? Do you ever find yourself reading a store-bought pattern and think the people who wrote it were on drugs? I do!

Monday, June 14, 2010

dream-dress

I got this dress from Anthropologie as my birthday present a few weeks ago. I almost didn't buy it because it was strapless, but there were secret little straps hiding in a bag clipped to the tag! And it's in linen!

My usual reason to go to Anthropologie is to get inspiration for clothing designs. I have actually only bought something from there one other time, and both of these things have been on the sale rack. But my philosophy on expensive clothing is: if I would spend lots of money on the fabric and hours of my time trying to make it and then fail--then it's worth it to spend a little money for a nice piece of clothing. And this dress is definitely the type of fitted bodice and full skirt style that I've been trying versions of for years and never getting right.

Another great clothing philosophy is that you can always find something sort-of-okay and alter it to be better and unique. I did this a lot in college with thrift-store finds. Two of my favorite dresses in college were both from the maternity section, and all I did was take them in to be fitted. Have you ever altered something that wasn't great and made it a favorite?

What are your "clothing philosophies"?

Monday, May 31, 2010

dirndl variation

This is another project started during pregnancy and not completed until after the baby was born. In hindsight, I don't think my belly would have fit under the waistline, even though I made it higher. The way it turned out reminds me a little of a regency-style dress.


My mother-in-law bought me the amazing fabric at a store in St. Louis--it's a linen and silk blend. Just heavenly in texture! I would make everything out of this if I could. The pattern is from Folkwear, a traditional Austrian dirndl that I changed a lot to get this result.


What is a dirndl? Basically a type of dress that is sleeveless and buttons in the front with a full skirt, although there are several variations on it. I fell in love with the style while watching Julie Andrews in The Sound of Music. I'd really like to make one with a dropped waist like she wears in the movie.


Here is a close-up of the main alterations to the pattern. I added in a lot of width to the bodice front so I could make these nice pleats. I also tried a hand-made button hole technique learned last summer at the weaving conference--it worked really well! The light purple edging and button holes are done using the blanket stitch, which is very easy. I also didn't make the skirt very full. It's basically an A-line with pleats in the front.


Monday, May 24, 2010

chinese-style robe

This project was actually started last summer as something to wear during my pregnancy, but I didn't finish the embroidery until the week after the baby was born! So now it just needs a belt to cinch in the waist. The material is blue linen with a white linen facing, and then just white cotton embroidery thread.

The pattern, from Folkwear, was extremely easy. I did do a few things differently than the instructions though. The trim is supposed to be a thick band of contrast material, but I turned this to the inside as a facing and just left a thin piping edge showing. The overlap of the robe is traditionally fastened with "frog" closures, but I couldn't find any--and I was snapping so many onesies on the baby that I thought snaps would work well, and they do! The belt was also an addition to the pattern. The best part about this is that I can easily unsnap it to nurse the baby. (Alas, much of my wardrobe is unwearable right now because of the need for nursing access.)
If I made another one, I would probably use a looser, more drapey fabric. The linen is a little stiff.

Monday, May 3, 2010

Bird Mobile


This is one of the few hand-made things that I thought would be worthwhile for a baby. The birds were amazingly easy and quick. The branch is cut and hung easily too--this one is from our crabapple tree. I really like the organic shapes of the branch and birds together, whether a baby knows what they are or not it's nice for me to look at!

The pattern is from Spool and there is a huge flickr pool of ideas.

It was really fun going to my favorite fabric store (Sarah's in Lawrence, KS) and picking out all the different colors. I bought fat quarters of every color and only used about 1/6 of each piece, so I'm trying to decide on another project to use them with.


This bird is one I made for a friend who just had her baby. The two-color combinations are endless.


Here's a picture I took of what the baby sees lying in the crib. And to my delight, I actually caught her looking and cooing at them the other morning--yay, it works!
And if you don't know any babies to make them for, I thought they'd look great on a Christmas tree or even as a wall decoration in the house. (I'll probably be making more of them at some point for one or both of these purposes.)
Do you know of any super-quick-and-easy projects like this? It seems like good ones are hard to find.

Saturday, December 26, 2009

last-minute presents


I made three pairs of these slippers for friends that have cold wooden floors in their houses. I looked at a few different slipper patterns and ideas, but ended up making my own pattern and figuring out solutions to various problems that came up.

They are surprisingly easy to make and, since I did 3 sets of them and am now an expert, I'm hoping to put together a tutorial to post in a few weeks.

This is a close-up shot of an upside-down slipper. I wanted to show the sole, which is covered in a thin layer of silicone. I read online that it's a great way to make the slippers have traction, so they won't slip on smooth floors. I was a little unsure about spreading silicone on a nicely finished slipper, but it works wonderfully!


While we drove to St. Louis to see my husband's family for Christmas, I decided it was a good time to knit these fingerless mitts for a friend of mine. She has four children and mentioned once that she can't wear gloves because she's always dealing with carseat buckles and zippers and things she needs tactile ability for. So I thought she could at least keep her wrists and palms warm with some fingerless mitts, even if her fingers are still exposed. I used the Lovisa pattern from ravelry, but changed a lot of it. I made them shorter, used only one color, added ribbing at the two ends, and actually had to start over with 10 less stitches than the pattern because they were huge. (I must have had the wrong gauge or something.) But they came out nicely.

We had a white Christmas here in Kansas City, it's been snowing for two days now. I wish I could get a good picture of it. There's just nothing more contenting in the winter time than to knit or weave by the fire and watch the snowflakes coming down in thick flakes outside.

Sunday, December 6, 2009

Christmas Projects


Here's a few things I've been working on for Christmas presents. First, a wrist pincushion using an offset square that I found a sewing tutorial for on Planet June's blog. (She gave excellent instructions!) This is for one of my co-workers who does a lot of sewing for Missouri Town. It was an extremely easy and quick project, and I really like the unique shape.

Next, a pillow for our annual Weavers Guild gift exchange. This year the theme was rectangles. I'd seen a pillow in a department store last year that was decorated with strips of different ribbons, and of course I thought, I could do that! The gift exchange can be anything sewn, woven, felted, etc., and I chose the easy route this year. If you're going to weave something, it's much better to have extra from an earlier project, since last-minute weaving doesn't really work.


Also, these baby oxen are a present for my other friend from Missouri Town (the ox-driver). I'm using the lamb pattern I made last summer and will eventually give them needle-felted horns and spots. I'll be sure to post a finished picture.
Of course, I have at least 4 other projects going that need to be finished in the next two weeks, so hopefully they will get done in time!
Do you have any great handmade Christmas presents that you've either given or recieved?

Thursday, September 24, 2009

Mother-In-Law's Dress

A few months ago, my in-laws came to visit and I was wearing this dress. My mother-in-law liked it so much she asked me if I could make her one. She wanted a few things different like the color and thickness of the material and the length of the skirt and sleeves. It's such an easy pattern that I agreed.

I didn't end up finding the right fabric until we visited them again in St. Louis and we went fabric shopping together. There is this wonderful little fabric shop in Kirkwood called Sew It Seams. I was drooling over half of the fabrics in the store--lots of linen-silk blends, tencel, fine wools, and cool woven structures like herringbone. We decided on a lovely sage green tencel twill that fit both the requirements: it had a good drape and it wasn't see-through.


The printed pattern is one I borrowed from an Anthropologie blouse about 3 years ago. I'm very pleased I was able to use the print blocks again, and they're still in good condition despite being carved from the easy-cut stuff which typically breaks easily.


The hard part of this dress was the printing of the design. It's a little nerve-racking trying to line up each one and print the whole hem and sleeves evenly. It also took me longer than I remembered.


The finished product. It would look much better if I had a picture of her wearing it, but I got a call from her yesterday that she'd received it and it fit quite well. If I get a picture of her in it, I'll have to post it.

Just a note on sewing for other people: If someone wants a very specific thing made for them and it's fitted at all--good luck with that. I have had several experiences making fitted bodice dresses for friends that went very wrong and were very frustrating on both sides. It probably attests to my lack of sewing skills to fit people other than myself, but I would caution anyone considering a complex project for a friend. I agreed to this project because it was not fitted, was a very loose shift dress, and because I had made the pattern before and knew it was super easy.
Do you have any interesting stories about making things for other people?

Friday, June 5, 2009

Draping Experiment

I recently came across a brilliant idea for making your own custom dress form out of duct tape. I successfully convinced my husband to wrap me in duct tape (while he was watching a basketball game) and voila! it's really easy! And cheap! I would highly recommend investing in some duct tape and a few hours of your time for this great tool.

Of course I immediately had to use it for a project, and I've always wanted to try draping. I actually have no idea what you're supposed to do, but I just used common pattern sense and tried it. I have attempted making my own patterns tons of times, but all in the flat form--and not one of them has really worked (except for skirts.) But this was pretty successful. I had an idea for a dress and just pinned some scrap fabric onto the form and drew the lines I wanted for the neck, then cut it out. Then I moved on to the bodice, and on down. Now, I did have to make a first version and then tweak a second version in the scrap cloth. But once I was satisfied with it, I cut it out of the nice fabric and sewed it up--very successful, at least compared to my previous attempts at making patterns.


Here is the finished dress on the dress form. I wanted to use some old lace on it, but it looked hideous, as you can see, so I took it off again.


In the back I put a ton of pleats for the skirt's fullness. The only problem I ran into was that the dress was higher on one side than on the other at the waist. If you look closely at the first dress form picture, you can tell that my right shoulder is significantly lower than my left, and I ended up taking over an inch off of the right shoulder seam. Weird! I have never had that problem before and I wonder if it's because of making the pattern on a dress form of myself.


The finished product, I'm very happy with it. I finished it just in time for my friend's wedding. This picture was taken after wearing it all day, so there's wrinkles from sitting down. The material is a linen/bamboo blend herringbone twill in dull gold and cream.

In other news--gooseberries! My husband loves gooseberry pie and I picked just enough off of a bush planted at my parent's house. Unfortunately, I do not like gooseberry pie, but it's fun to make anyway. One of the best things about summer is berry picking. We're going to get strawberries tomorrow! Mmmmm... my mouth is watering just thinking about it.

Monday, May 18, 2009

Leather

About 5 years ago, when I would just splurge on things recklessly, I bought 2 buckskins and made a very ugly dress out of them. Last week I decided to reuse the leather and try making a little bag. I just made up the pattern; I drew it on paper first. It was pretty easy, I even used my sewing machine.

The only drawbacks were some skipped stiches, the thickness of the leather, and it shifting too much under the machine. I used some green linen scraps to line it with. Overall, it turned out nicely, but I don't think I'll use it except at Renaissance Fest or maybe Missouri Town. It's a little too small for an everyday purse.

Does anyone know of a good purse pattern? I am thoroughly sick of my current purse--I've had it since I was 13. So it's time to move on. I've looked for a new one, but the ones I like are out of my price range (over $100). I'd love to make one if I had a good pattern to use--I don't trust myself to make up the pattern.
Have you ever made your own purse? How did it turn out?